Categories
IoT

JSON on the Meadow MCU

From a thread I responded to on the Wilderness Labs forums, I got the Meadow microcontroller building a JSON object and sending the result to a .net API server

The question came from someone trying to use the NewtonSoft JSON framework which has too many associated libraries and the Meadow runs out of memory.

When I moved the code from NewtonSoft to System.JSON, it was interesting to watch how many DLLs were uninstalled from the Meadow:

[26/01/2021 20:39:02] Meadow successfully deleted 'Newtonsoft.Json.dll'
[26/01/2021 20:39:12] Meadow successfully deleted 'System.Xml.Linq.dll'
[26/01/2021 20:39:22] Meadow successfully deleted 'System.Runtime.Serialization.dll'
[26/01/2021 20:39:32] Meadow successfully deleted 'System.ServiceModel.Internals.dll'
[26/01/2021 20:39:42] Meadow successfully deleted 'System.Data.dll'
[26/01/2021 20:39:52] Meadow successfully deleted 'System.Transactions.dll'
[26/01/2021 20:40:02] Meadow successfully deleted 'System.EnterpriseServices.dll'

The other challenge was that (at the time of writing) the Meadow doesn’t support TLS and most publicly available API’s are https URLs. So I built a local API server to test against.

The class on the Meadow looked like this now

public async Task SendNotification()
{
Console.WriteLine("Start Notification: " );
try
{
string uri = "http://192.168.1.11:8002/api/MeadowLogs";
Console.WriteLine("Build object: ");
var data = new
{
LogData = "Meadow"
};
Console.WriteLine("Serialize Data: ");
string httpContent = JsonSerializer.Serialize(data);
Console.WriteLine(httpContent);
Console.WriteLine("Build httpcontent: ");
var stringContent = new StringContent(httpContent);
Console.WriteLine("Create http client: ");
var client = new HttpClient();
Console.WriteLine("Adding Headers: ");
stringContent.Headers.ContentType = new System.Net.Http.Headers.MediaTypeHeaderValue("application/json");
Console.WriteLine("Sending Message: ");
var response = await client.PostAsync(uri, stringContent).ConfigureAwait(false);
var result = response.Content.ReadAsStringAsync();
if (response.IsSuccessStatusCode)
{
return true;
}
else
{
Console.WriteLine(response.ReasonPhrase);
return false;
}
}
catch (TaskCanceledException ex)
{
Console.WriteLine(ex.ToString());
return false;
}
catch (Exception ex)
{
Console.WriteLine(ex.ToString());
return false;
}
}

The code for the Meadow, the API server and the sql for a backend Postgres database table are all up on github
https://github.com/unixbob/MeadowJSON

Categories
mobile

Simple Debugging in Xamarin Forms

Text labels in your XAML can be given a name. And that name can be referenced in the code behind. First create a label in your XAML. Stick it in the content page and not in ToolbarItems as there isn’t enough space there really. I usually give that label a silly name that’s completely disassociated with the topic of the app I’m writing, so that it stands out when I want to find it and comment it out.

<Label x:Name="banana" Text=“”/>

Now you can reference this label in the code behind. Say for example you have a string variable called CloudType. What I find useful is to state the name of the variable, and then the values held in the variable.

banana.Text = "CloudType: " + CloudType;

Or if you’ve you’ve got a variable that’s not a string, say CloudHeight is an int, then you can tag a ToString on the end

banana.Text = "CloudHeight: " + CloudHeight.ToString();

Probably not the most elegant or best practice way to debug your code. But it’s a quick and easy way of trapping bugs

Categories
mobile

Make a good cup of coffee

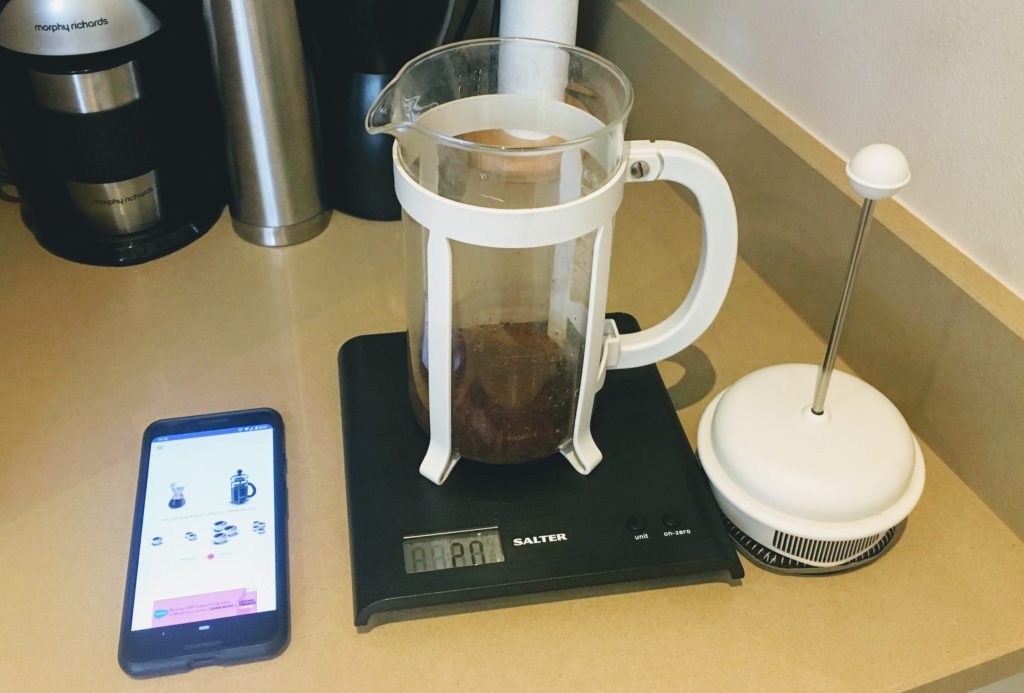
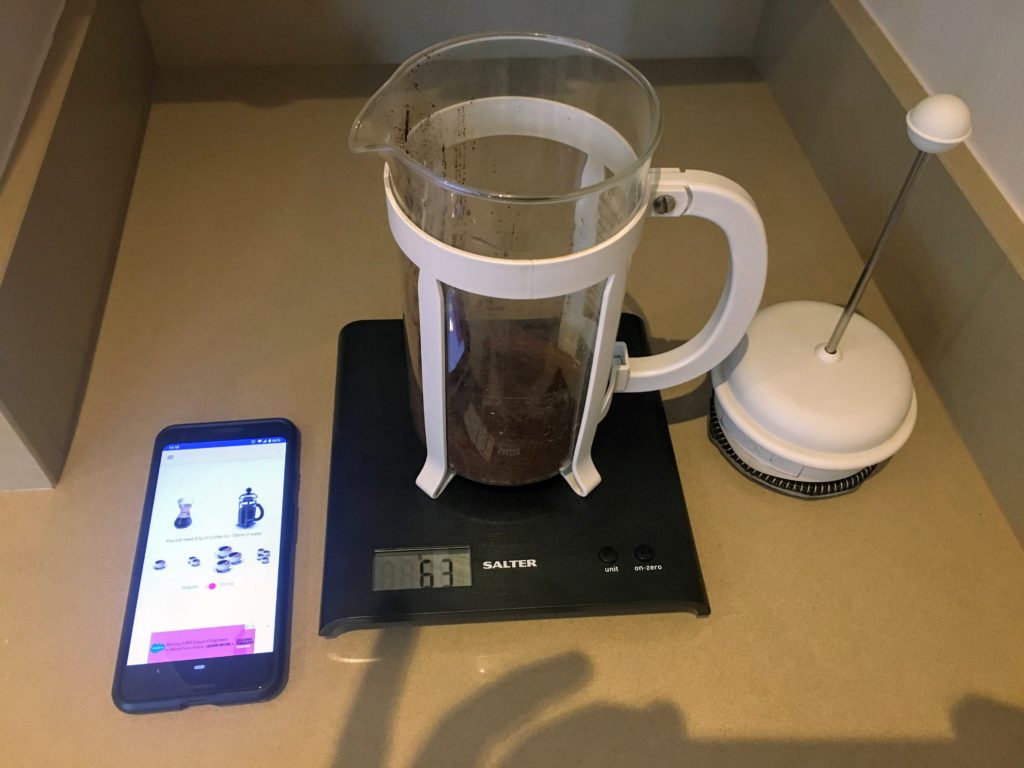
Here’s an easy (and cheap) way to make good coffee every time, without spending a lot of money. The secret isn’t lots of expensive machines, but good ingredients that you can measure. Find the right recipe, then you can make and remake it every single time. And to make that easier, I’ve written an app. As an example of dong this on a budget, I get by with the following:

The key is to weigh the coffee (before you grind it) because coarse ground coffee takes up more space than fine ground coffee. So you can’t go with volume.

Then measure the water.

Then make the coffee.

Now depending on whether you’re making a drip coffee or an Infusion coffee (like a french press) will depend on how much coffee / water you’ll need. And whether you want a regular or strong cup of coffee. So I made an app to help me get it right. Nothing fancy but it’s made my daily coffee a lot better. You can get it on iOS or Android

There’s lots of ways you can improve this. Grinding your coffee beans fresh will get a better cup of coffee. Then upgrading to a burr grinder instead of a blade grinder will get another level of improvement. But then it’s starting to get expensive and that increasing cost might be difficult to justify for the improvement in taste. (I deliberately took pictures of my basic equipment in a small part of my kitchen to show you don’t need a big fancy setup to get a good repeatable system going).

For me, just moving to filtered water, and then measuring the coffee to water ratio made a big difference. It’s infinitely better than any kind of instant coffee. It’s better than the capsule based coffee machines I used to have. It’s better than just standard filtered coffee because I can tell when it’s too bitter and make adjustments. Using the app made it easier for me. Hopefully someone else will find it useful too.

Categories
projects robots

Project Hexapod Part 3: No plan survives contact with the enemy

Design change 1:

Originally, I was going to control the hexapod from an Arduino pro mini.  Partly because that’s how I originally started the project.  But also, because I’d heard ropey things about raspberry pi’s and Python controlling servo’s in real time.  I was however planning to use a raspberry pi zero-w as a master.  The control system would connect to the Bluetooth adapter in the PI, some of the more complex calculations could be done on the PI, and then the PI would send messages to the Arduino which was in charge of moving the legs.

When I’ve seen people on YouTube do this (Tom Stanton, James Bruton), they often take this approach.  But that’s partly because they seem to have a remote-controlled background and are using devices like RC car controllers or drone controllers (and the associated electronics on the robot end).  I don’t have those devices and don’t have that experience. 

After playing with the Arduino code a bit, I’m starting to think that idea is a pain in the ass.  There’s the physical weight of the Arduino, but also the additional power draw it will take.  The calibration of the servo’s and the interfacing between the pi and the Arduino seems like extra work.  And configuring the servo’s end stops on the Arduino seems like a massive kludge. 

Most of my coding experience is with mobile apps.  My thought process was to write a smart phone app to connect to the device over Bluetooth.  Therefore, I’m not going to be going down the physical handheld controller route.

In addition, I have more experience with UNIX based systems.  So once the remote is walking, I’m more interested in doing client / server / web stuff where the robot is interacting with both it’s environment but also the web.  Whilst I have very little experience in Python, I have more experience in that kind of UNIX based scripting language than the C based Arduino language.  I’m not a natural developer so I need to minimise the number of language’s I’m learning.  I expect I’ll have more usage out of Python from a professional and personal projects perspective

For all of that, I’m now planning on ditching the Arduino and seeing just how difficult it is to get the pi zero-w to control the servo’s using the PCA985 PWM controllers over I2C.

Categories
projects robots Uncategorized

Project Hexapod Part 2: More walking design thinking

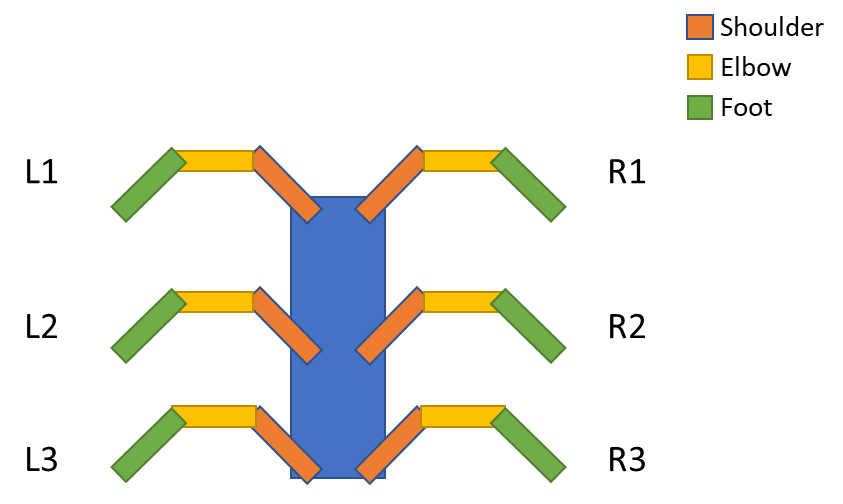
Each leg on this robot has 3 motors; a shoulder, an elbow, and an ankle

To make things easier I labelled them up like this:

There are 18 separate motors to control:

BoardServoBoardServo
LeftFrontShoulderPwm18RightFrontShoulderPwm17
LeftFrontElbowPwm110RightFrontElbowPwm15
LeftFrontAnklePwm113RightFrontAnklePwm12
  
LeftMiddleShoulderPwm19RightMiddleShoulder136
LeftMiddleElbowPwm114RightMiddleElbow141
LeftMiddleAnklePwm115RightMiddleAnkle150
  
LeftBackShoulderPwm28RightBackShoulderPwm27
LeftBackElbowPwm29RightBackElbowPwm26
LeftBackAnklePwm210RightBackAnklePwm25

Design Thoughts

First thought was to create a function that controls each limb.  At the least every limb should move in the same way.  However, whilst limbs move together from the gait perspective (Figure 2) I don’t think we can do that from an Arduino perspective.  I don’t think I can create a function that says move limbs L1, R2, L3 at the same time.  I think I’ll need a function that does that.  But then separately what it’s doing is moving “Left Front Shoulder, Right Middle Shoulder, Left       Back Shoulder” together, then “Left Front Elbow, Right Middle Elbow, Left Back Elbow”, etc.  until that function is complete.

I think I’ll have a multidimensional array with degrees in it for each joint.  What I might do though is write a routine which sets each joint to 0.  Then unscrew and reattach the joints so I know where zero is on each motor.  Either way, I probably need a few lists to define:

the start and end position of each joint for a forward motion

the start and end position of each joint for a circular motion

the start and end position of each joint for being sat still.

That currently looks like this:

NameBoardServoservo_minservo_max
LeftFrontShoulderPwm18500500
LeftFrontElbowPwm110  
LeftFrontAnklePwm113  
LeftMiddleShoulderPwm19  
LeftMiddleElbowPwm114  
LeftMiddleAnklePwm115  
LeftBackShoulderPwm28  
LeftBackElbowPwm29  
LeftBackAnklePwm210  
RightFrontShoulderPwm17  
RightFrontElbowPwm15  
RightFrontAnklePwm12  
RightMiddleShoulder136  
RightMiddleElbow141  
RightMiddleAnkle150  
RightBackShoulderPwm27  
RightBackElbowPwm26  
RightBackAnklePwm25  

Maybe a piece of code that takes serial input and resets the device to zero’s.

Control System:

Due to its built in Bluetooth, I’m thinking about having a raspberry pi zero-w connected to an Arduino nano over USB Serial:

https://maker.pro/raspberry-pi/tutorial/how-to-connect-and-interface-raspberry-pi-with-arduino

ser=serial.Serial(“dev/ttyACM0”,9600)

Then I can both ssh into the robot to tell it what to do.  And I can also write a phone app to act like a remote control, connecting over Bluetooth.  The v5 of the robot car did that.

Categories
robots

Project Hexapod Part 1: Walking Design

The design of the hexapod looks like this.  Each “limb” comprises of a shoulder, elbow and a foot.  The shoulder moves in a horizontal plane, left and right.  The elbow and feet move in vertical plans, up and down.

To control the hexapod, I need to consider stability. My current plan is to move three legs at a time. Something like this

This is an example gait I’ve found online.  It resembles how an ant walks.  So either side always has at least one foot on the ground and the robot should be balanced.  And this should be quicker (and easier) than moving each foot at a time. 

#Problem – how do I make walking asynchronous?  If I have a single function to move a limb, how do I move two limbs at once?

#Answer


/* Sweep
 by BARRAGAN <http://barraganstudio.com>
 This example code is in the public domain.

 modified 8 Nov 2013
 by Scott Fitzgerald
 http://www.arduino.cc/en/Tutorial/Sweep
*/

#include <Servo.h>
 
Servo servo1;  // create servo object to control a servo
Servo servo2;  // create servo object to control a servo
                // twelve servo objects can be created on most boards
 
int pos = 90;    // variable to store the servo position
 
void setup()
{
  servo1.attach(8);  // attaches the servo on pin 9 to the servo object
  servo2.attach(7);  // attaches the servo on pin 9 to the servo object
}
 
void loop()
{
  for(pos = 90; pos >= 19; pos --){
  servo1.write(pos);
  servo2.write(180-pos);
  }
  //delay(5000);
  for(pos = 19; pos <= 90; pos ++)     // goes from 19 degrees to 90 degrees
  {                               
    servo1.write(pos);              // tell servo to go to position in variable 'pos'
    servo2.write(180-pos);              // tell servo to go to position in variable 'pos'
    delay(15);                       // waits 15ms for the servo to reach the position
  }
}

Note that this is my design process as I try and plan how I’m going to make this work, and part of that is trying to understand what’s possible. So this isn’t my code, but an example of how to control the servos I found here .

Categories
watercooler

Job descriptions don’t matter these days

I had a good catchup with an old boss today. Chewing the fat about the state of the industry, how roles are changing (and how they aren’t). Last year he moved from a very traditional IT vendor to a hyperscale cloud provider and we ended up in a discussion around how recruitment is changing

Today he isn’t reading CV’s when trying to recruit.  Predominantly because job titles no longer reflect the jobs we do (and the associated experience we can offer an employer). AI is scouring LinkedIn on his behalf looking for relevant skills he needs.

On reflection after our catchup, I think that’s related to the changing nature of our world.  In the 80’s you could go to college to learn a skill and be relatively confident that’s the job you would have until you retire.  Today AT&T is investing a billion dollars in it’s Lifelong Learning Program in recognition that unless it continues to evolve it’s products and services to meet the rapidly changing needs of the world, it will get left behind.  And it can only do that if it has a workforce capable of continually developing and learning.

Which on the one hand is mentally challenging and somewhat unsettling because nothing you learn is fixed.  Conversely it means that we’re always learning new things and developing.  Dislike your job today? Don’t worry, you’ll be doing something completely different in a few years

Categories
projects robots

Project Hexapod: Introduction

In 2018 I was building lots of Arduino projects. One of which was a robot car which sense walls using ultrasound to sense when it was about to drive into a wall. In the video below I connect via bluetooth, then enter some commands into the Arduino serial console

To build on this I decided to make a hexapod – a walking spider.

https://www.instagram.com/p/B-UYLZ4gD9uStzXugmaBnCfFzCwmCFCYKgSnoE0/

The parts are still available here, although there isn’t a codebase to use the robot – you need to make that yourself. And that’s what this new project is about.

Categories
Uncategorized

Privacy Policy

Privacy Policy

This policy applies to all information collected or submitted on applications.

Information we collect

We collect the information you save in the App but the data does not leave the app. So effectively if you can see the data in the app, that’s the data being collected. But it isn’t going any further

Ads and analytics

We don’t track your usage, not show you banner ads

Information usage

We do not have access to your data.

We do not share personal information with outside parties (because we don’t have access to it).

Accessing, changing, or deleting information

All data is held locally within the Feelix App. If you wish to delete this data, clear the app storage settings. No data is transmitted externally

Third-party links and content

Third party links and content are not part of the App

Information for European Union Customers

We stores your data locally. No data is transmitted outside of the app itself

Your Consent

By using our site or apps, you consent to our privacy policy.

Contacting Us

If you have questions regarding this privacy policy, you may email feedback@pressedontech.com.

Categories
cloud social watercooler

Hybrid IT vs Hybrid Cloud – a changing landscape

I recently had the opportunity to speak at a CxO peer to peer networking event, run by Gartner.  I was on stage with a leading Finance Sector CTO, who described how he is deploying new systems into Azure and he’s enjoying the flexibility that brings. However he has legacy (auto corrected himself to “traditional”) workloads that due to the nature of the application will always reside within the data centre.  He also said without prompting that if you think the cloud is cheaper then you’re in for a surprise.

That story resonated with anecdotes from other customers.  The appeal of the hyperscale public cloud is it’s flexibility and speed to market.  However with most things in life, anything you rent is always going to end up being more expensive than anything you buy.  In addition, at the inception of the public cloud paradigm there were some assumptions around only running applications when you need them and therefore not paying for unused resources.  Which is fine in a research paper, a lab or a startup with only 1,000 customers.  But start adding real people (especially non-IT folk) to that mix, and overlay existing business processes into that mix – most decent sized enterprises experience is that switching things on and off isn’t realistic for a good proportion of the applications they use.

In context, I think the landscape is maturing somewhat.  There used to be a narrative that everything is agile and due to a variety of factors (security, latency, etc.) you want the public cloud agility but those factors constrain you.  So why not use OpenStack / Docker / Stackato / Vmware to have a private cloud for the best of both worlds???  Let your applications magically float between clouds. That has been the common hybrid cloud story for the past few years.

Right now I’m hearing more people talk about not everything needing to be Netflix.  Some new workloads are public cloud native and need the agility and flexibility it provides (along with associating it to a specific P&L).  But some things just don’t need that flexibility (and specifically those things are commonly running the majority of the business’ revenue driving workloads).  In addition newer workloads such as AI where the maths is so compute intensive that dedicated on-prem GPU accelerated infrastructure is the preferred platform once things get past R&D.

Today’s story is becoming less Hybrid Cloud where apps move between different environments, and more Hybrid IT where different platforms have different benefits and those are the decision points around where to host them