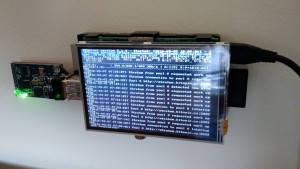
Earlier this year I built a Bitcoin mining project with my old Raspberry PI. Even though it’s the older model, the USB ASIC offloads all of the CPU processing so it’s an ideal project for the older PI (there’s a whole separate thread around whether we really need the extra CPU horsepower in the newer PI’s. Although a benefit is that the old model B’s will probably get a lot cheaper on ebay)
Buyer Beware – I did this about 4 weeks ago and had loads of fiddling to make it work. I’ve gone back through bash histories to document everything I did. If I’ve missed anything then that’s my excuse. But feel free to drop me a line if you’ve tried stuff and it doesn’t work.
I installed a clean version of Jessie to start the project. But I had to do a fair amount of fiddling to get the screen up and running. Most of the effort in getting this project working was around getting the screen to a) work, and b) stay on. As such I thought I’d document it here to see if it helps anyone.
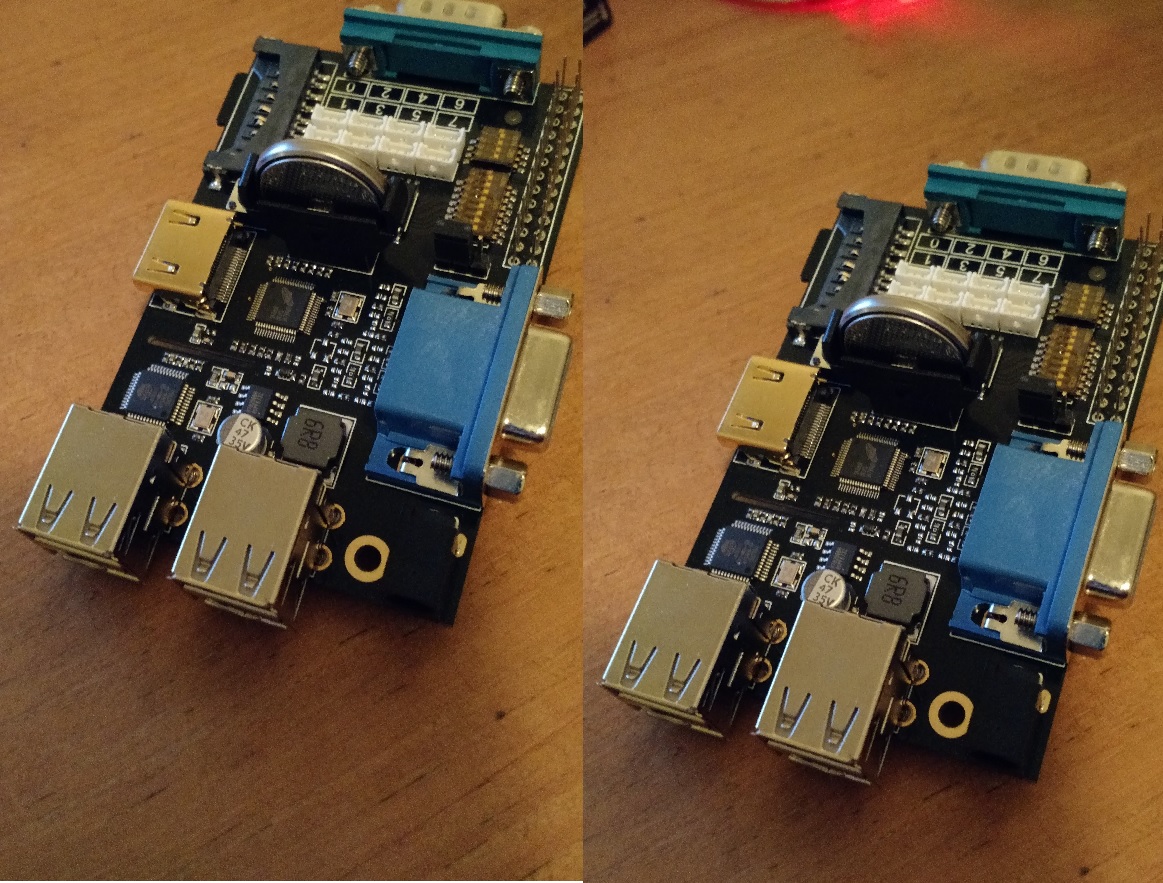
The screen I picked up is from Amazon – described as a “Makibes® 3.5 inch Touch Screen TFT LCD (A) 320*480 Designed for Raspberry Pi RPi/Raspberry Pi 2 Model B”. The back of the screen says “3.5inch RPi LCD (A) V3 WaveShare SpotPear”.
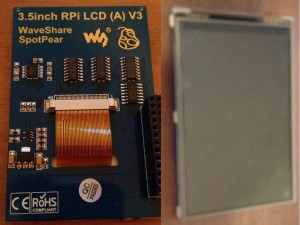
I think the Makibes thing is a rebrand as most of the google search results for the errors I was getting were brought up the WaveShare screen. As per the comments in the Amazon page, this link many found helpful. It got me to the point where I could manually load the modules. But it didn’t stay persistent over the reboot. As per the page I just linked to (and I’m just copying and pasting his work here, check out the link for the full info), I could get the screen working with a modprobe
modprobe flexfb nobacklight regwidth=16 init=-1,0xb0,0x0,-1,0x11,-2,250,-1,0x3A,0x55,-1,0xC2,0x44,-1,0xC5,0x00,0x00,0x00,0x00,-1,0xE0,0x0F,0x1F,0x1C,0x0C,0x0F,0x08,0x48,0x98,0x37,0x0A,0x13,0x04,0x11,0x0D,0x00,-1,0xE1,0x0F,0x32,0x2E,0x0B,0x0D,0x05,0x47,0x75,0x37,0x06,0x10,0x03,0x24,0x20,0x00,-1,0xE2,0x0F,0x32,0x2E,0x0B,0x0D,0x05,0x47,0x75,0x37,0x06,0x10,0x03,0x24,0x20,0x00,-1,0x36,0x28,-1,0x11,-1,0x29,-3 width=480 height=320
modprobe fbtft_device name=flexfb speed=16000000 gpios=reset:25,dc:24
If your screen matches the description above and that works, then happy days. Here’s what I ended up doing to make it persistent post reboot:
First off, if it isn’t already enable SPI in the raspi-config tool
in “/boot/config.txt” I’ve appended the following lines
Enable audio (loads snd_bcm2835)
dtparam=spi=on
# dtoverlay=ads7846,cs=1,penirq=17,penirq_pull=2,speed=1000000,keep_vref_on=1,swapxy=0,pmax=255,xohms=60,xmin=200,xmax=3900,ymin=200,ymax=3900
dtoverlay=ads7846,speed=500000,penirq=17,swapxy=1
dtparam=i2c_arm=on
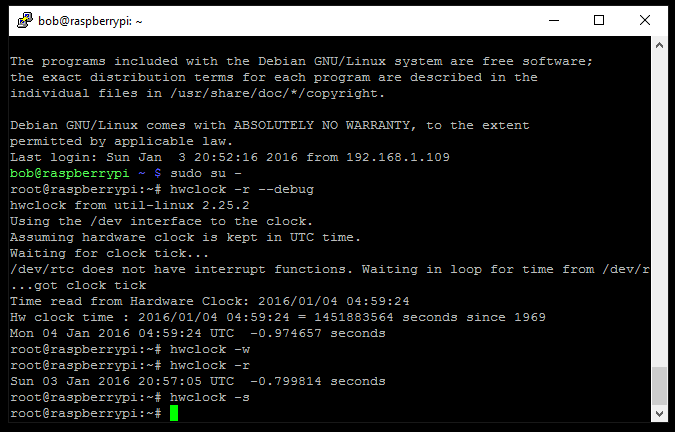
dtoverlay=pcf2127-rtc
# dtoverlay=w1-gpio-pullup,gpiopin=4,extpullup=1
device_tree=on
/boot/cmdline.txt passes parameters to the bootloader. I’ve appended a couple of lines to make the console appear on the SPI TFT screen instead of the default HDMI. Also, the console blanking is disabled
dwc_otg.lpm_enable=0 console=ttyAMA0,115200 console=tty1 root=/dev/mmcblk0p2 rootfstype=ext4 elevator=deadline fsck.repair=yes rootwait fbcon=map:1 fbcon=font:ProFont6x11 logo.nologo consoleblank=0
/etc/modules now looks like this:
snd-bcm2835
i2c-bcm2708
i2c-dev
Something I didn’t pick up from other forum posts and blogs is the config required to auto load modules on bootup. So I created /etc/modules-load.d/fbtft.conf to effectively do what modprobe is doing from the command line
spi_bcm2708
flexfb
fbtft_device
Console Blanking is apparently a bit busted in Jessie, so /etc/kbd/config needs the following settings (they aren’t next to each other in the file so you’ll need to search through it to make both edits:
BLANK_TIME=0
POWERDOWN_TIME=0
And /etc/init.d/kbd needs to look like this (search for screensaver stuff in the file – it’s quite long)
# screensaver stuff
setterm_args=""
if [ "$BLANK_TIME" ]; then
setterm_args="$setterm_args -blank $BLANK_TIME"
fi
if [ "$BLANK_DPMS" ]; then
setterm_args="$setterm_args -powersave $BLANK_DPMS"
fi
if [ "$POWERDOWN_TIME" ]; then
setterm_args="$setterm_args -powerdown $POWERDOWN_TIME"
fi
if [ "$setterm_args" ]; then
# setterm $setterm_args
TERM=linux setterm > /dev/tty1 $setterm_args
fi
That should get you to the point where your Raspberry PI will reboot and then always use the TFT screen as a display output.
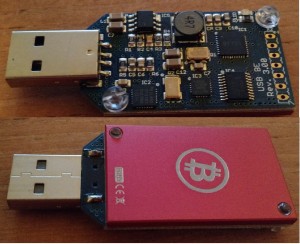
To complete the project I used this USB ASIC to do my bitcoin mining. Amazon is out of stock at the time of writing. However it will give you what you need to search ebay for, etc. This instructables is complete enough that there’s little point me replicating it here. However, there were a couple of additions that I needed to do before it worked and to complete the project.
First off I needed to install some additional packages:
sudo apt-get install autoconf autogen libtool uthash-dev libjansson-dev libcurl4-openssl-dev libusb-dev libncurses-dev git-core
Download the zip file, build and install the code
wget http://luke.dashjr.org/programs/bitcoin/files/bfgminer/3.1.4/bfgminer-3.1.4.zip
unzip bfgminer-3.1.4.zip
cd bfgminer-3.1.4
make clean
./autogen.sh
./configure
make
sudo make install
The last part of the project is a total hack as I ran out of steam with my enthusiasm. It’s pretty insecure and absolutely not best practise, etc. etc. But I got lazy, and it works. I’m sure you can make something better given a few more brain cells. First off, make sure the pi boots into console mode and not x windows.(option number 3 in raspi-config). Then choose option
B2 Console Autologin Text console, automatically logged in as 'pi' user
Then I created the following script – /home/pi/login.sh
#!/bin/bash
#
/usr/local/bfgminer-3.1.4/bfgminer -o stratum.bitcoin.cz:3333 -O username.password -S all
Every time it boots, the Raspberry PI automatically logs in as the ‘pi’ user. And everytime the pi user logs in, that script is run. Totally insecure. And I’ll probably go back and fix it when I’ve got a spare 30 minutes. But it works for now